Custom Platforms Guide
Emma's Guide to making Custom Platforms with additional contributions by gamesequence
DANGER
If you're creating models, it's extremely important that you read the Shader Migration Guide to avoid any shader issues
Intro
This guide was written under the assumtion that you have basic blender and Unity knowledge.
Here is what you need:
- Unity 2019.3.15f1 best installed with Unity Hub. An Installation guide can be found here.
- The Custom Platforms Project
- If you dont have any models you can make your own with Blender.
If you are new to the 3d modeling scene and would like to learn how to make 3d models, this video is a good place to start.
https://www.youtube.com/watch?v=9xAumJRKV6A&t=215s is not a valid YouTube URL!
First Steps
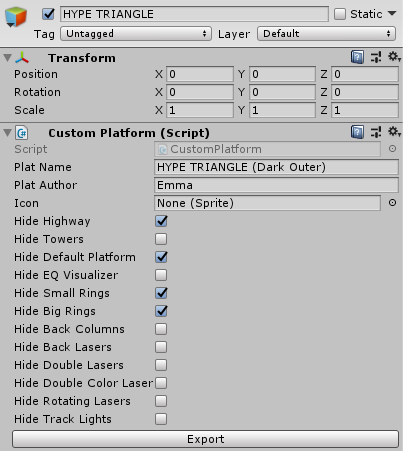
Create an Empty GameObject by right clicking in the Hierarchy window and selecting Create Empty. Make sure to set its position in the Inspector to the origin (0,0,0). Search in the inspector for the Custom Platform script and apply it to this GameObject. Everything inside this Object will be exported when the button on the Custom Platform script is pressed. In the script there are also Exporting options. These disable parts of the original platform (For when you want to replace something partially).
Adding Models
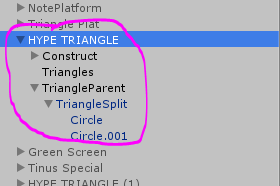
Drag all models you want in your Platform into the custom platforms GameObject and position them to your liking. For the materials of the models make sure to use Beat Saber compatible shaders or the ones that you can find in the Project called _dark_replace and _glow_replace. These are custom Materials that act like the Beat Saber materials, aka react to the tube lights and mist. You can also find more Beat Saber compatible shaders if you check the pins in #pc-3d-modeling.
Scaling Reference
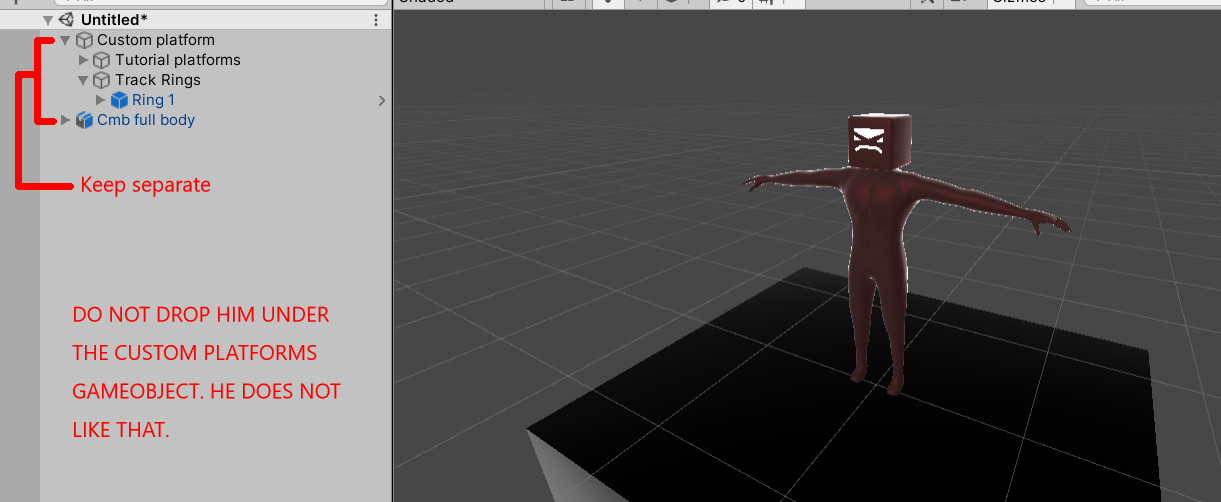
If you want to use a player reference to scale your platform to, gamesequence has created a humanoid CMB model which is 5 ft 10 in (177.8 cm) tall in real life. Note when you add the file to your project, make sure you keep it separate from the custom platform gameObject as shown below.
Track Rings
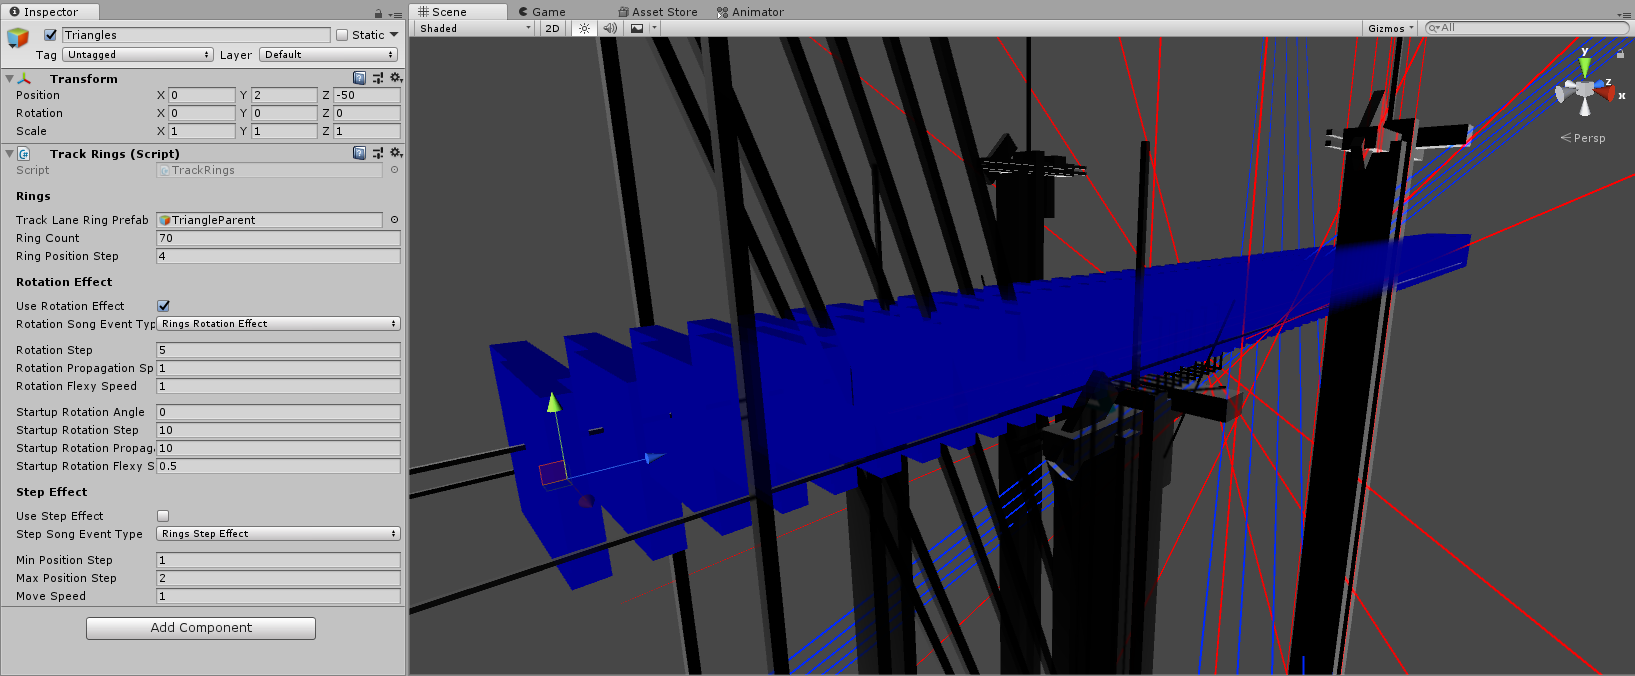
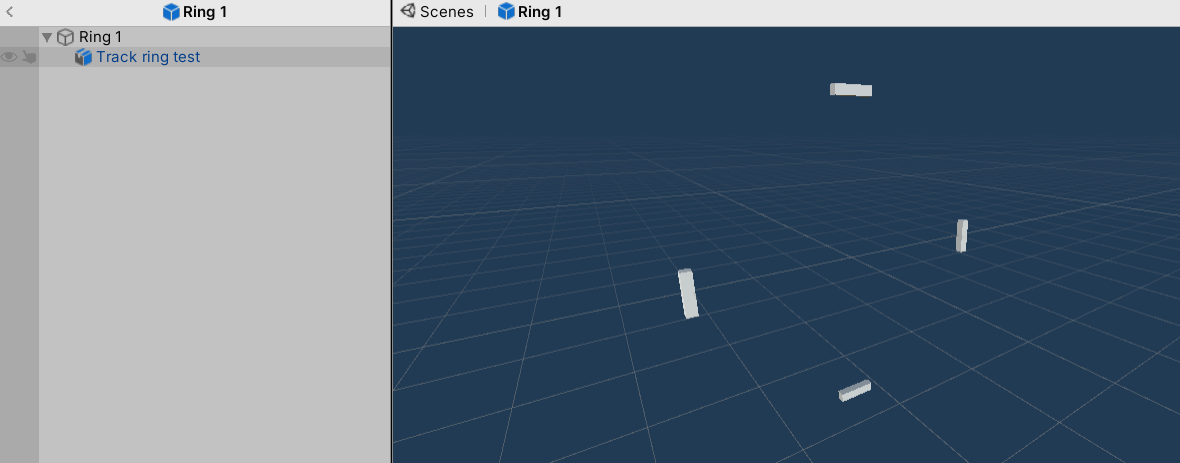
The Track Rings script makes track rings like those seen in the game. To achieve this, the script uses a prefab. Note that while the gameObject is named "Track Rings" in the images below, you can use any name that helps you keep things organized. Make a separate gameObject and attach the Track Rings script to it.

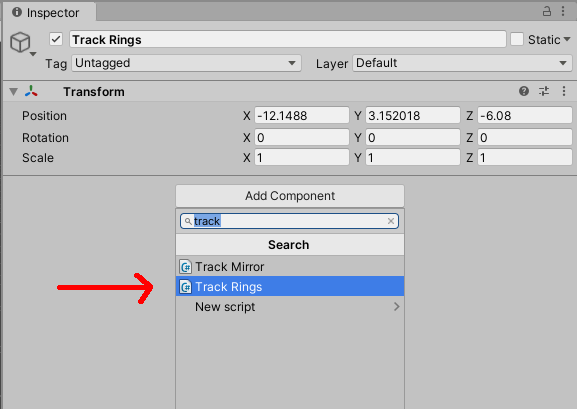
Next, drag the prefab you want to use under your Track Rings gameObject.
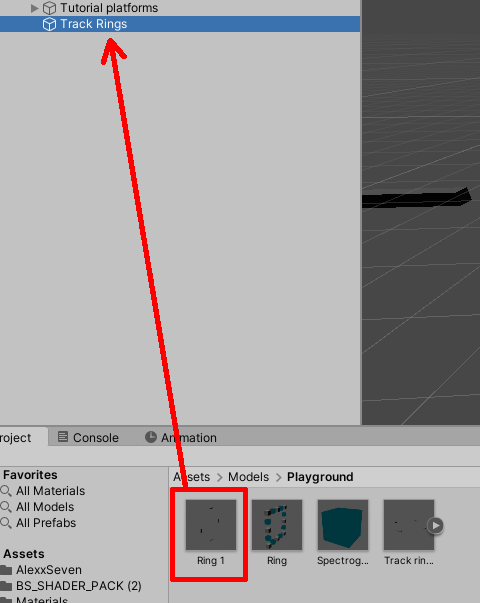
Then drag it to the Track Lane Ring Prefab field in the inspector menu.
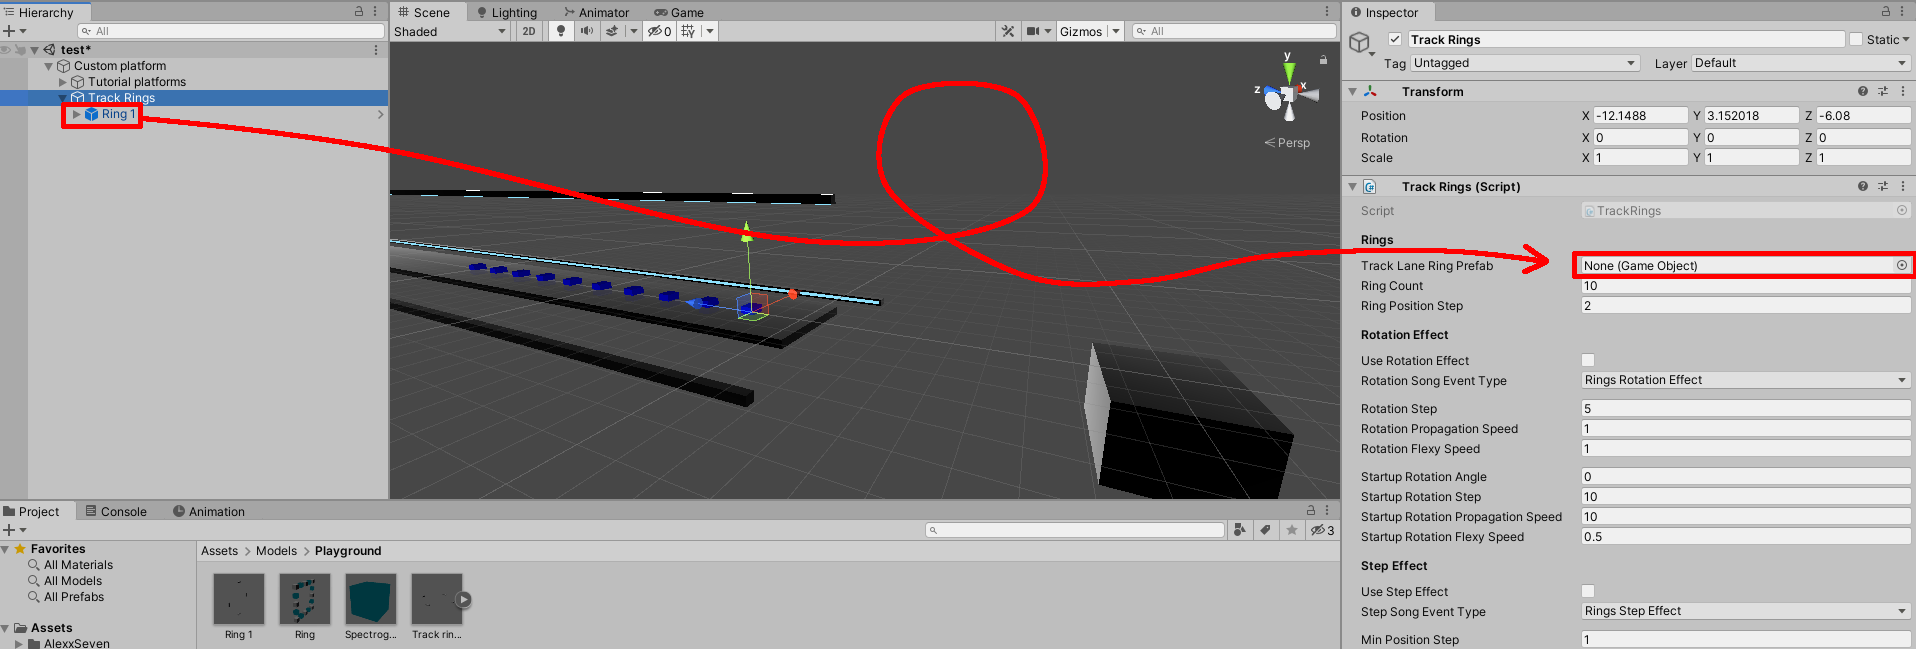
Your track rings will now appear in the scene and you can adjust how many rings are present as well as other settings to effect how they behave.
Note that your Track rings gameObject is where your track rings appear in-game. Move any children of this gameObject out of view.
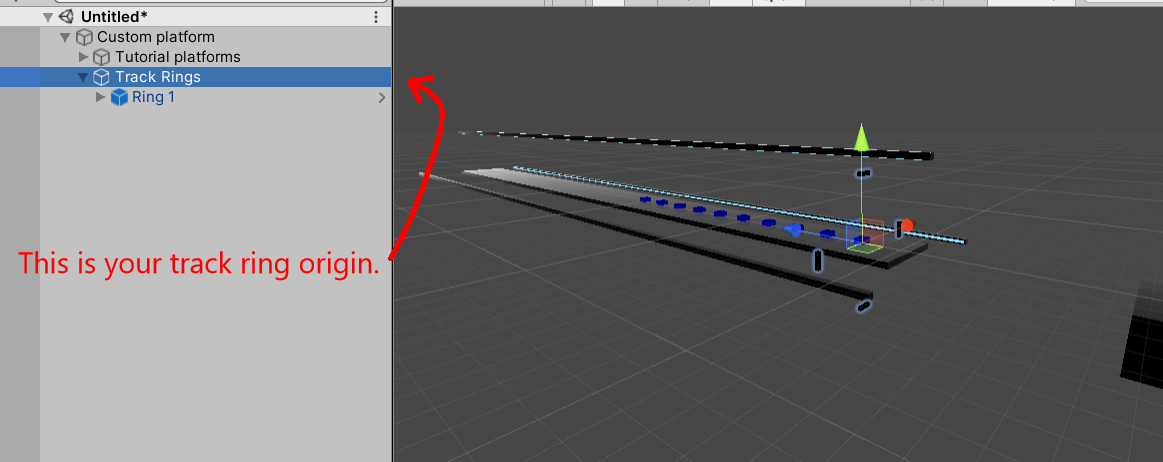
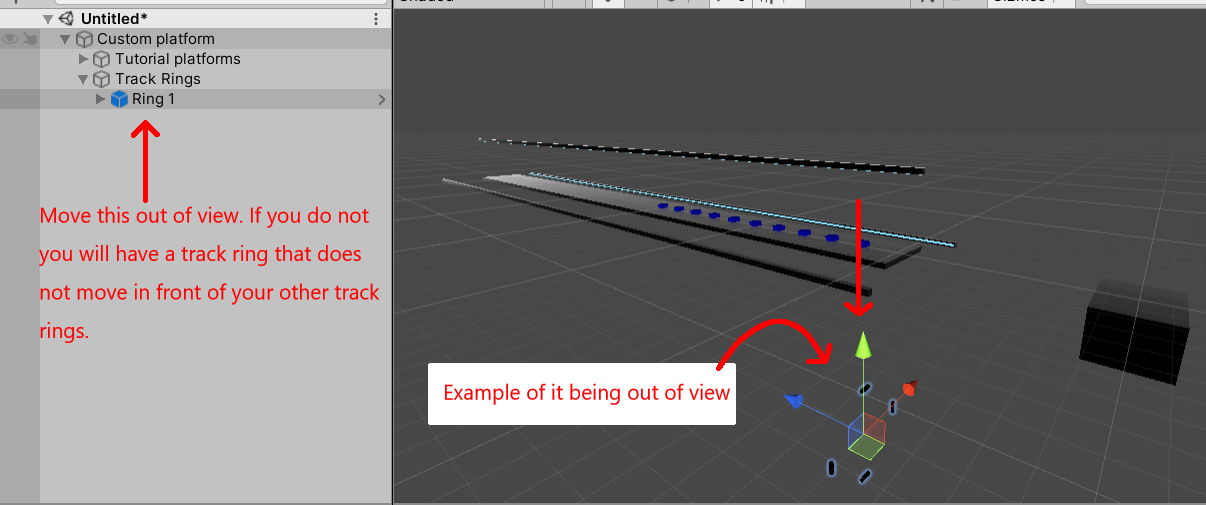
Enabling the rotation effect, makes the rings rotate by the specified event, depending on the variables it's given. (Be sure to experiment with the settings).
Enabling the step effect changes the rings spacing when the specified event is called between 2 variables.
Making a prefab
Prefabs act as a template that can be used to create new Prefab instances in a scene. Prefabs are useful for saving configured gameObjects across projects or if you need to make changes to multiple copies of the same gameObject.
Track Ring Prefab
One way of making a track ring prefab is by duplicating one of the existing prefabs under Assets/Models/Playground.
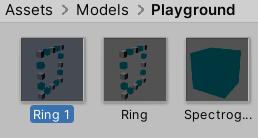
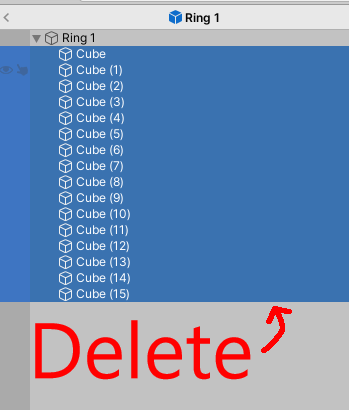
Open the prefab and delete everything under the gameObject that says Ring 1.
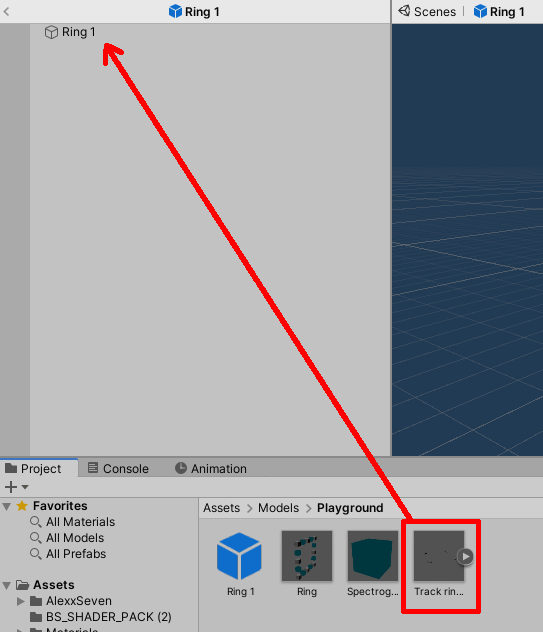
Drag and drop your track rings model on Ring 1. You can add any material that you choose to your track rings.
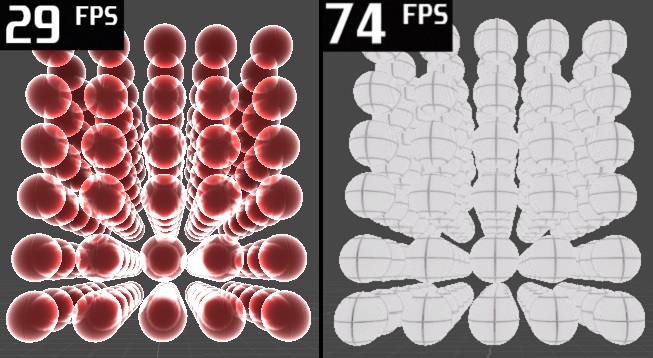
Note that different shaders can have different effects on materials including performance. For track rings, you should use a less intensive shader otherwise the game will lag for a significant number of users.
An example of this is the Beat Saber Standard shader on the left. It has a bigger impact to performance because it is using things like normal maps, ambiance, smoothness, rim lights, etc. The image on the right is using an Unlit Glow shader which only uses a flat texture.
Tube Light
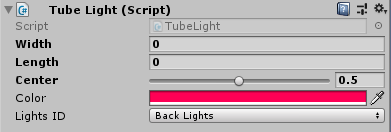
This script enables blinking lights. Putting this on an empty gameObject changes the background and adds a bit of color to that space, according to the light ID's. When a mesh renderer is applied, it will change the meshes color according to the light ID's. When using this no color adding is needed, so the size on the script was changed to 0.
Event Manager
If you want to add actions to in-game events in your platform, then this is the most useful script to make this work. To demonstrate, lets make an event that controls the glow colors as seen in-game. The Glow models are what we want to change color.
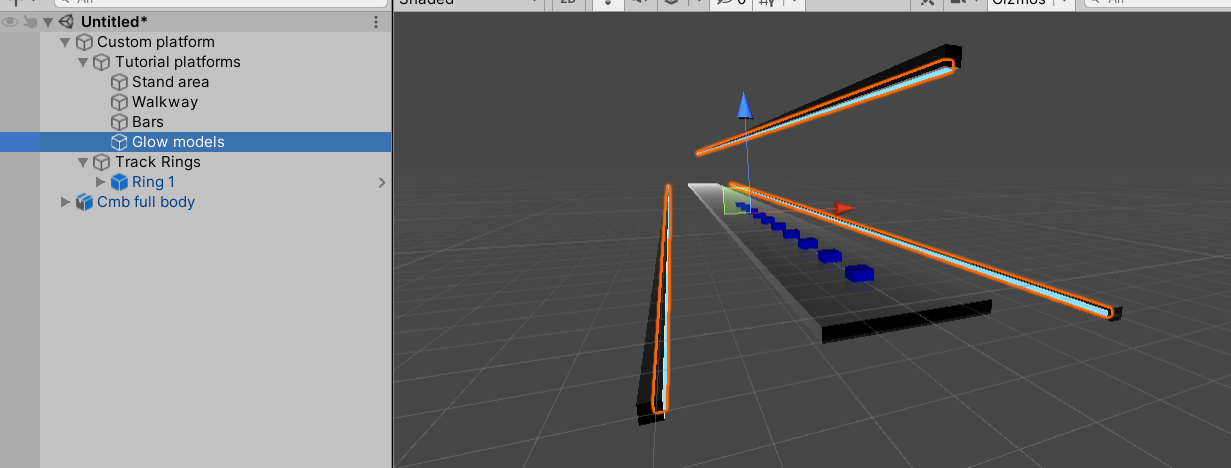
The event manager has different functions you can control based on different kinds of events. Such as when a level starts or the environments glow changes from red to blue. Add the Event Manager script to your custom platform gameObject.
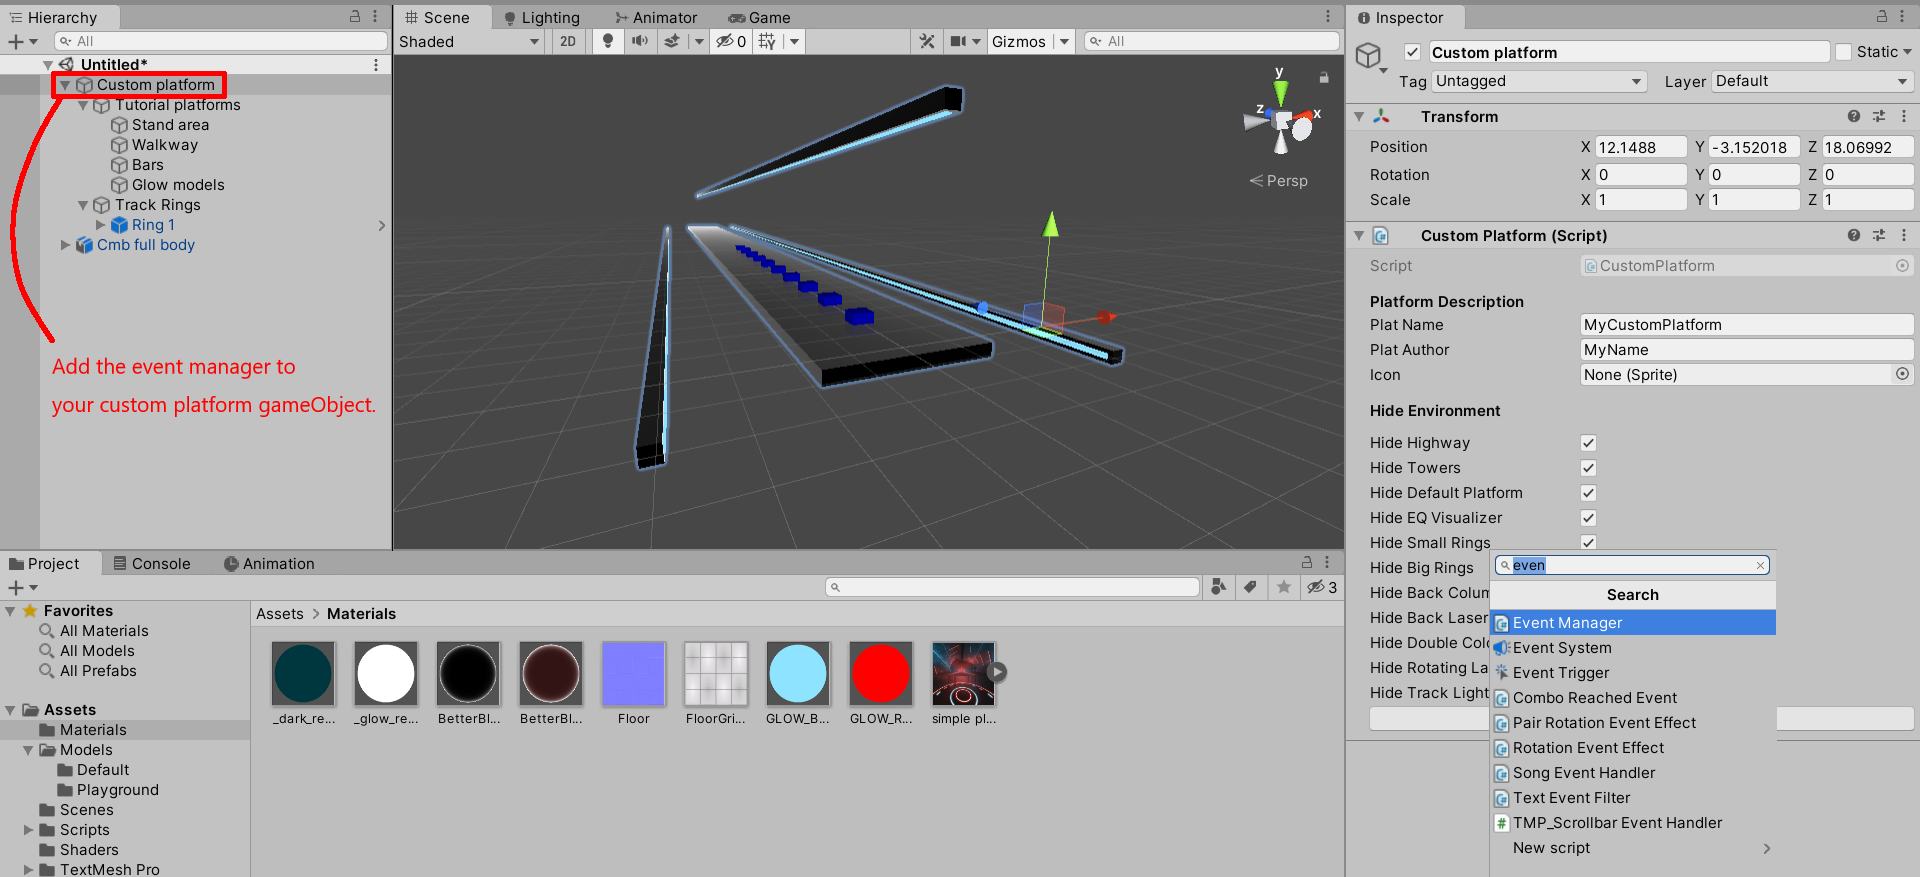
The image below shows different events you can add functions to.
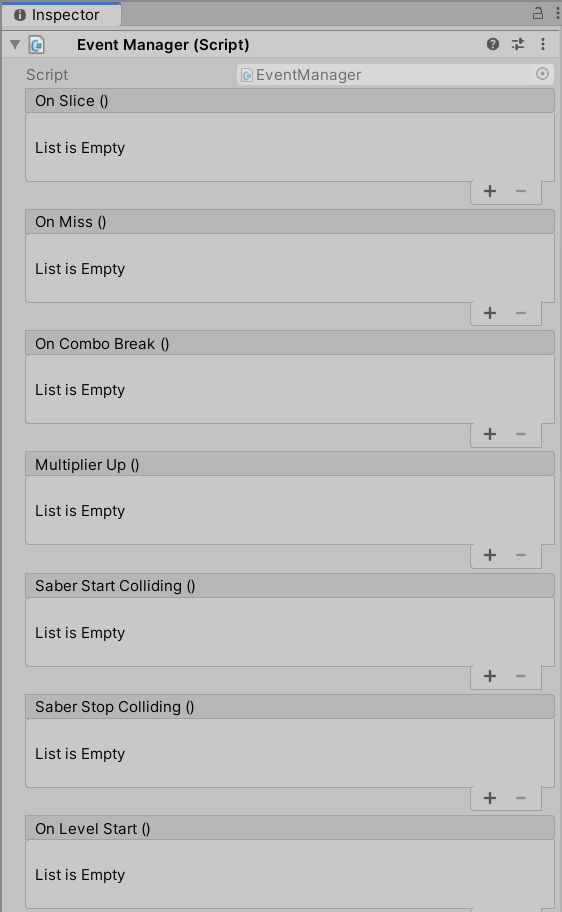
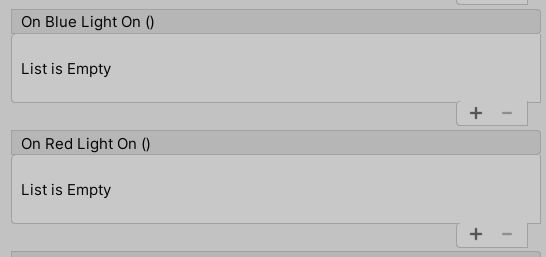
For controlling the glow, only these two events are needed.
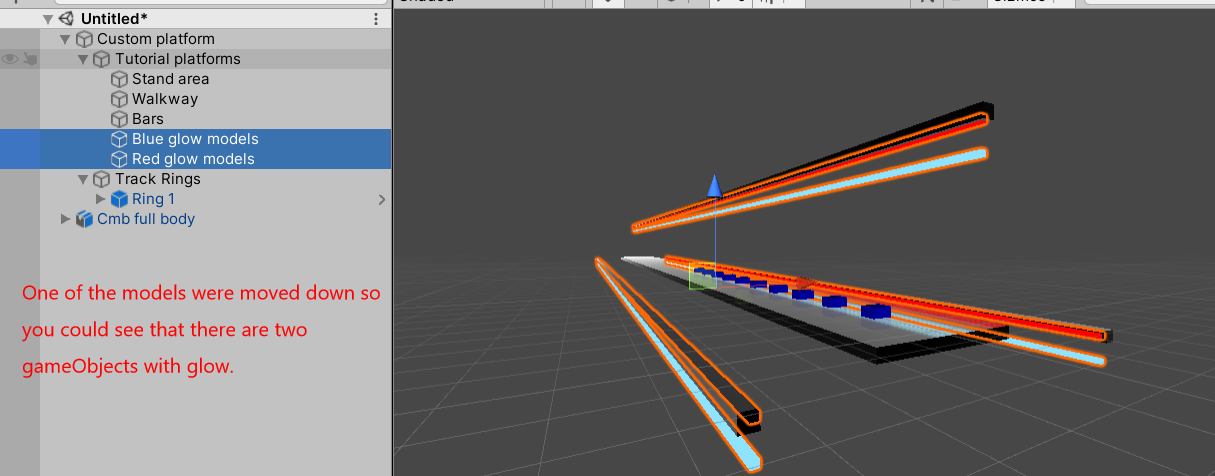
Duplicate the gameObject that you want to manipulate the glow with. In this case, it is going to be Glow models.
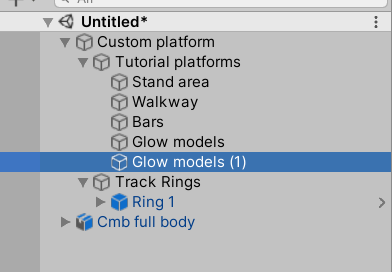
It is recommend that you rename your gameObjects that you want to manipulate to differentiate between the two. For example these are named Blue glow models and Red glow models.
In the event manager under where it says On Blue Light On() hit the + icon twice.
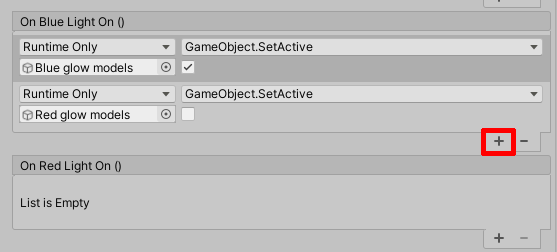
Go ahead and drag both of your glow model gameObjects into each of the two functions you added when you hit the + icon.

Click on No Function and navigate to GameObject and then select SetActive(bool). After that go ahead and click the check mark. The check mark turns the object on and off. When it is checked, it turns the object on and while being unchecked it turns the object off. Do the same with your other gameObject, but this time make sure the box is unchecked and then do the exact same thing you did on On Red Light On until you get something that looks like this.
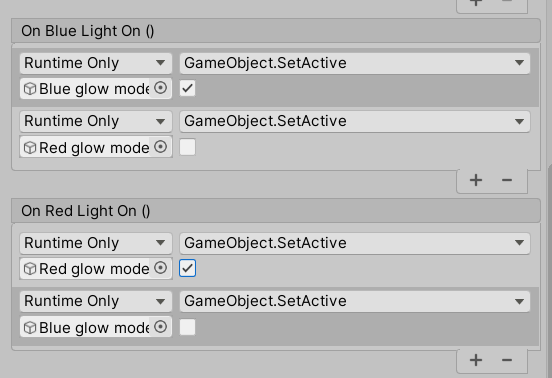
Now you will have changing lights in your platform! There are many options so go ahead and play around with them a bit.
Spectrogram
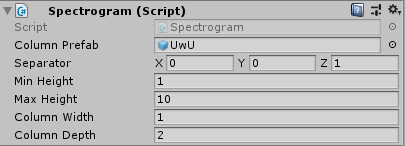
The spectrogram script works like the track rings script and also requires a prefab or gameObject. This will get stretched and shrunk according to the sound of the game and the variables provided. (Little is documented about it so be sure to test different things).
Exporting
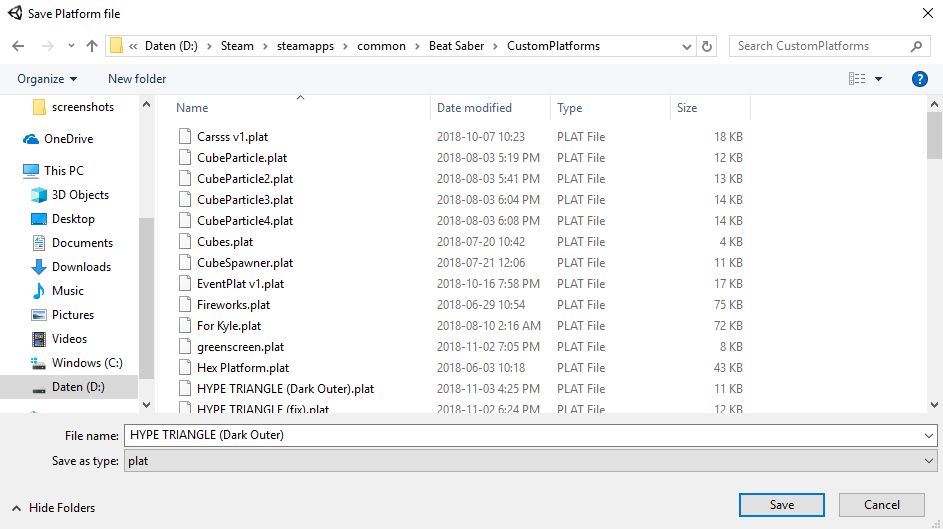
Export the platform trough the script that you previously added to the gameObject to the location of your choosing. Preferably the game's directory Beat Saber/CustomPlatforms.
NOTE
Once you've got your new platform working, upload them to ModelSaber if you want to share them with the world.
Baked Lighting
Kylon's Baked Lighting Platforms Guide
Use this to add Unity's Baked Lighting to your platform.
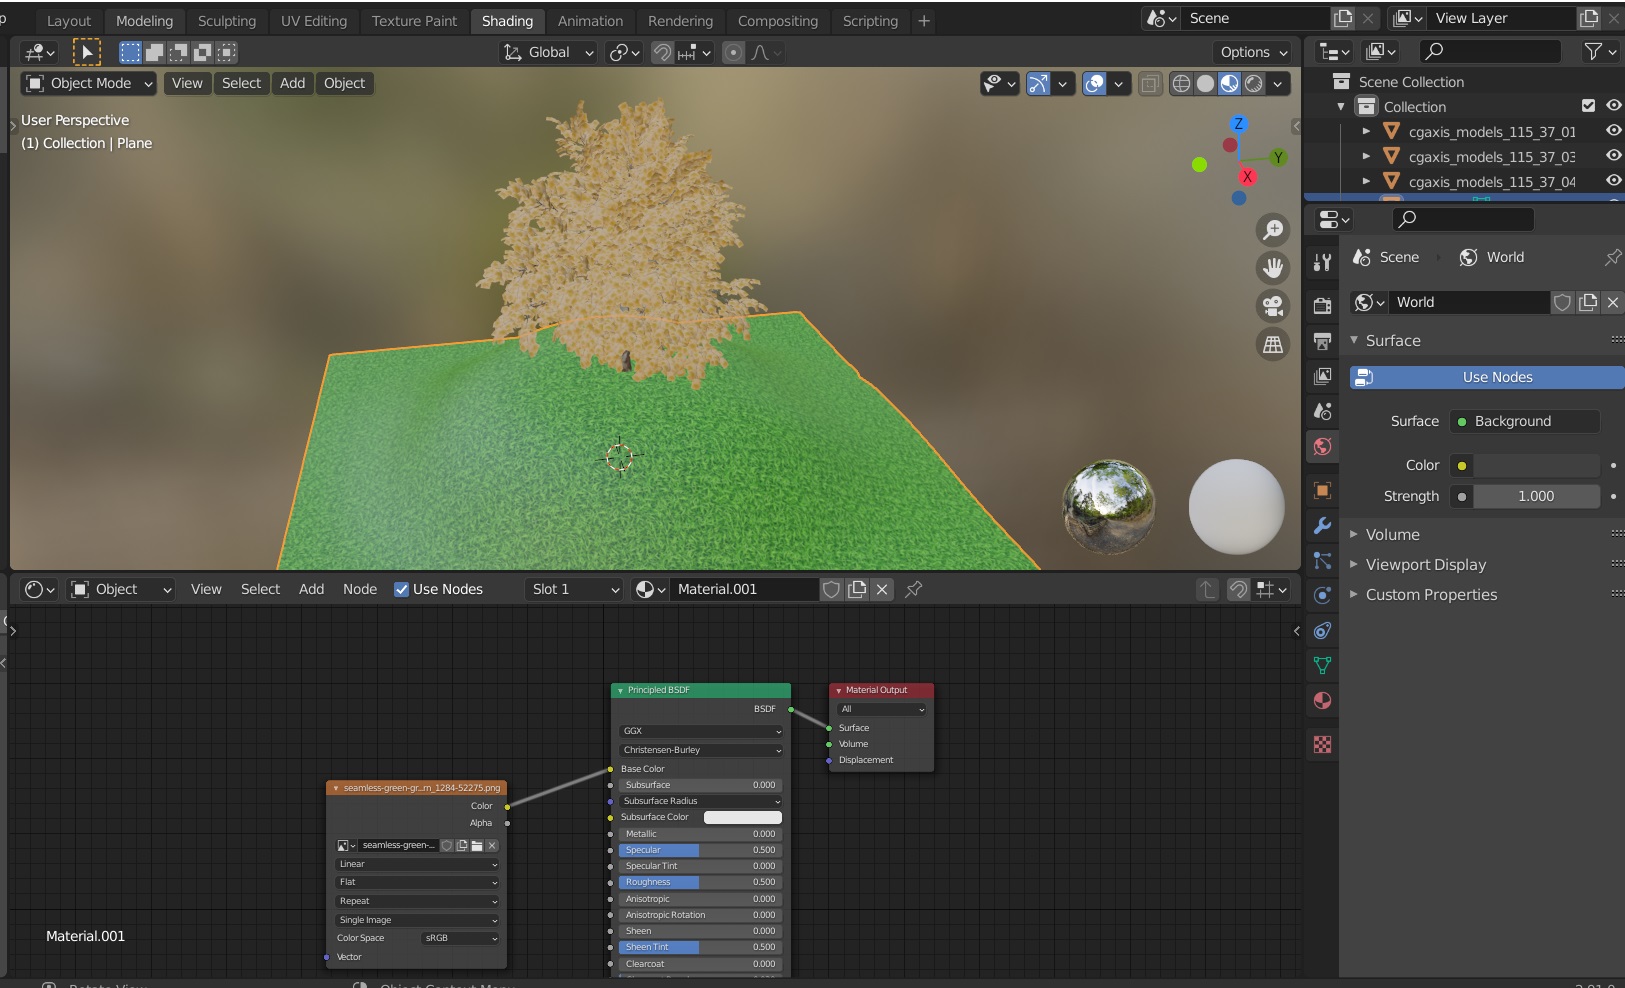
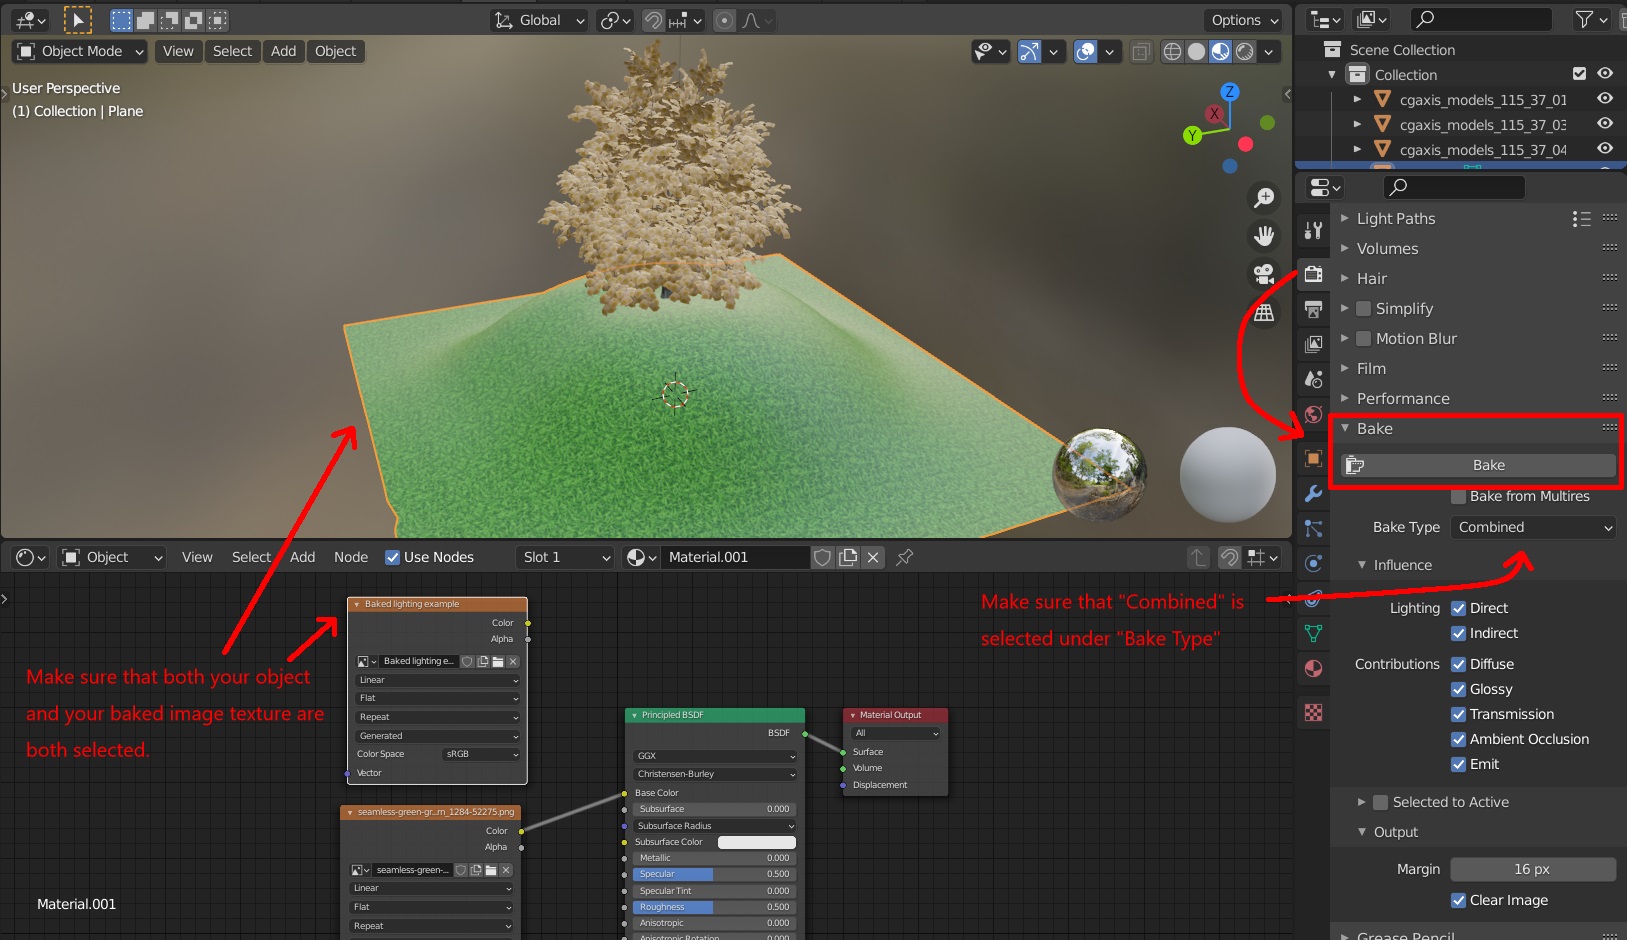
Note that Unity's baked lighting may not always provide the best results if working with more complex models. You can also bake lights in blender (Not only is this much easier but also produces much better results). Make sure you have light sources. These can be point lights, area lights or suns. In the shading tab, select the object that you want to bake the lights on.
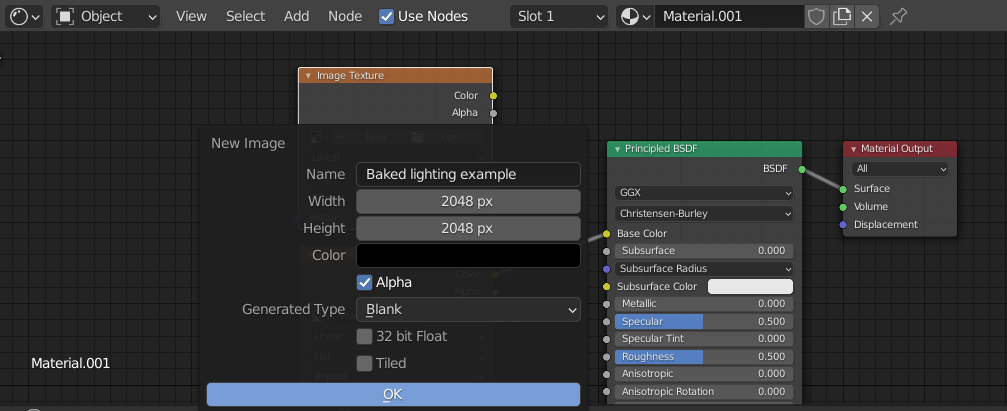
Add an image texture node and then click New. Change the resolution to how you see fit and then click ok.
Make sure to set the rendering engine to Cycles and that you select both the object and the image texture you are baking. Then click the bake button under the baking tab. Note that this will take some time depending on the resolution of the image.
If done correctly you will get a nice result such as this one:
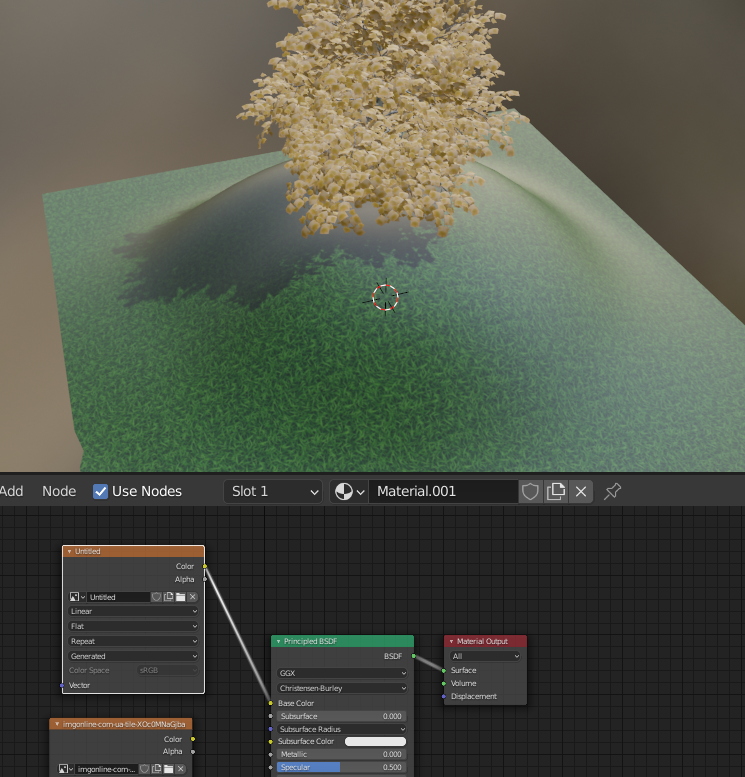
You're done!