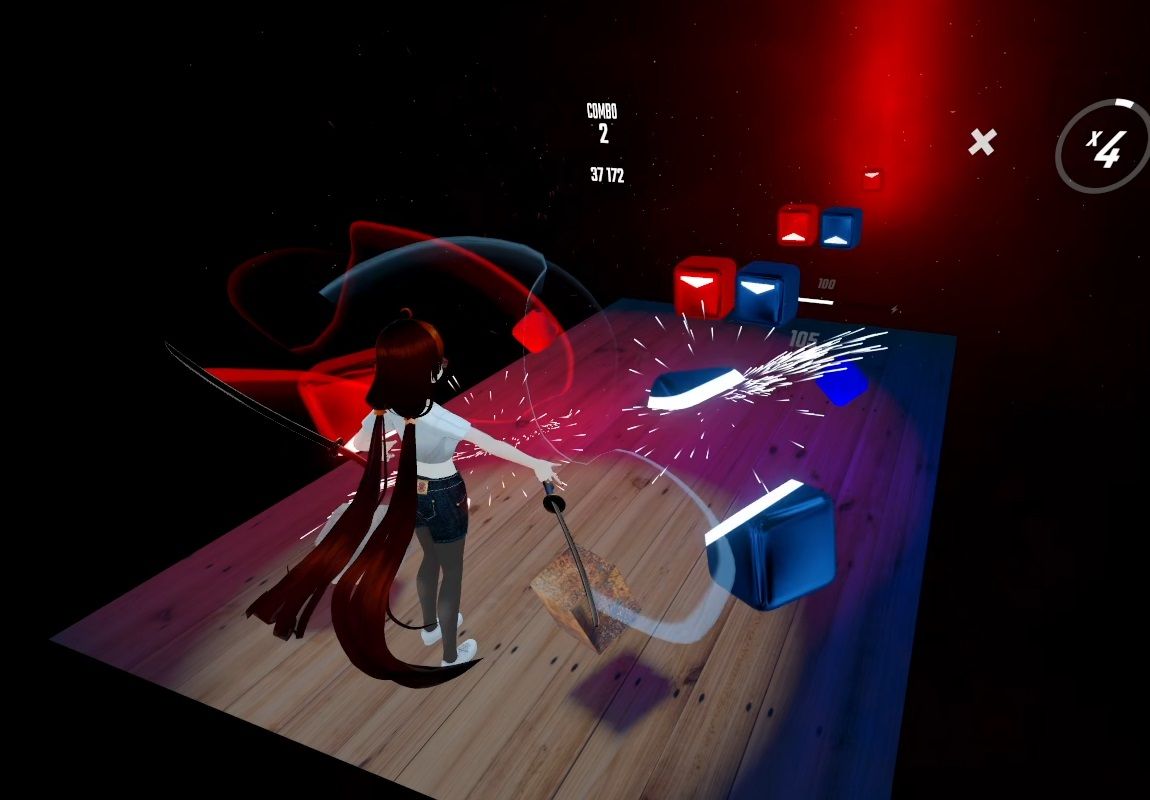
Baked Lighting Platforms Guide
You can now have Unity's Baked Lighting inside your Custom Platform!
First Steps
The version of Unity for making Custom Platforms is 2019.3.15f1. First create a platform the normal way as per the Guide to making Custom Platforms.
Please use BeatSaber compatible shaders that work with Baked Lighting. You can use the Custom.shader and GlassRefraction.shader shaders from the Beat Saber Modding Group's BS_Shader_Pack (Discord Link).
When you are finished the top Platform GameObject will have a CustomPlatform script already attached to it.
Unity's Baked Lighting
This part of the guide will go over how to bake lights in Unity 2019.3 and you can skip to PrefabLightmapping if you already know this.
For more information, consult the Unity Documentation on Baked Lighting.
Set Lights to Baked
You can have many lights in the scene and they can all cast shadows without affecting performance. All four type of lights in Unity can be baked:
- Directional
- Point
- Spot
- Area
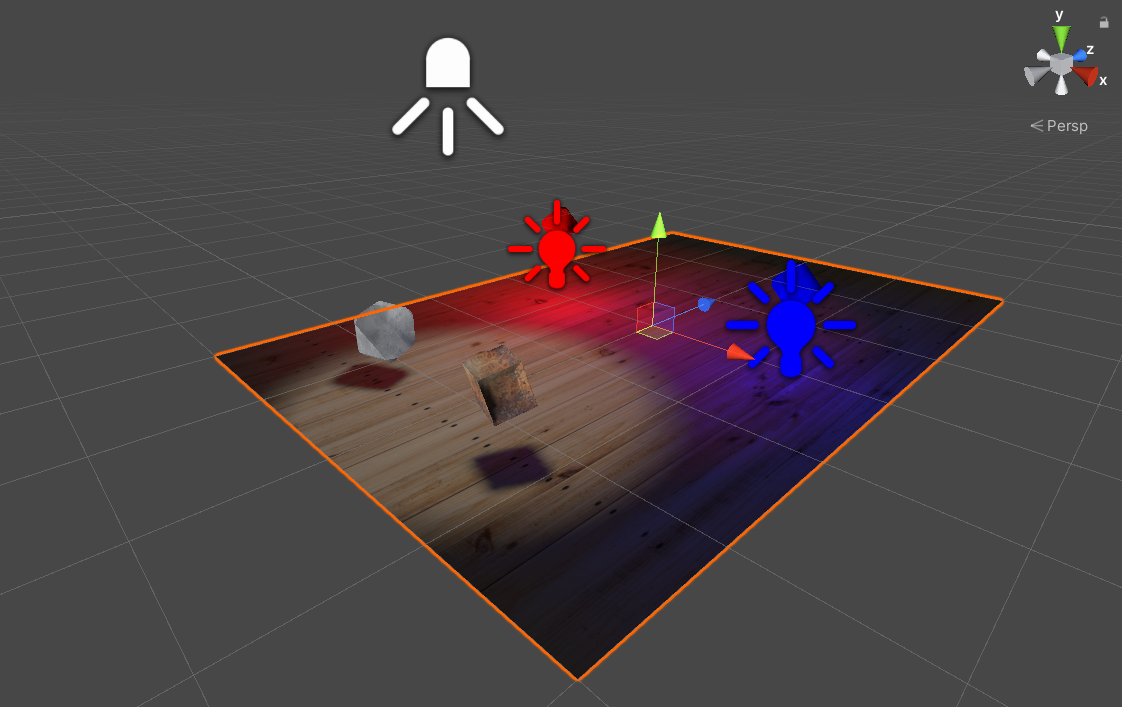
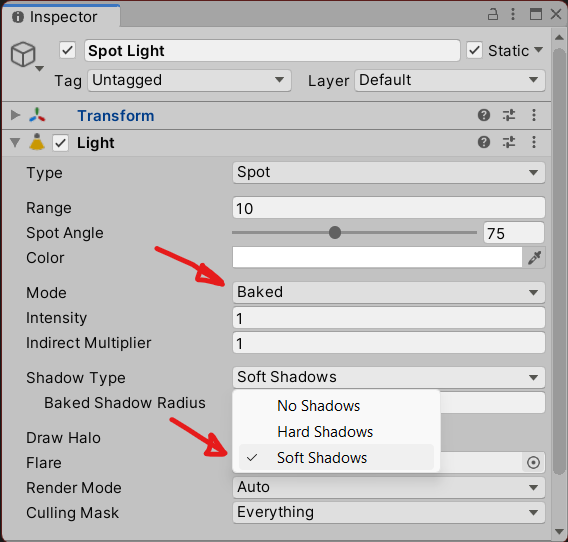
Set the Mode to Baked for the lights you want to be baked in the Inspector. Area Lights do not need to be set as they can only be used with Baked Lighting.
For the lights you want to cast shadows set the Shadow Type to Soft Shadows.
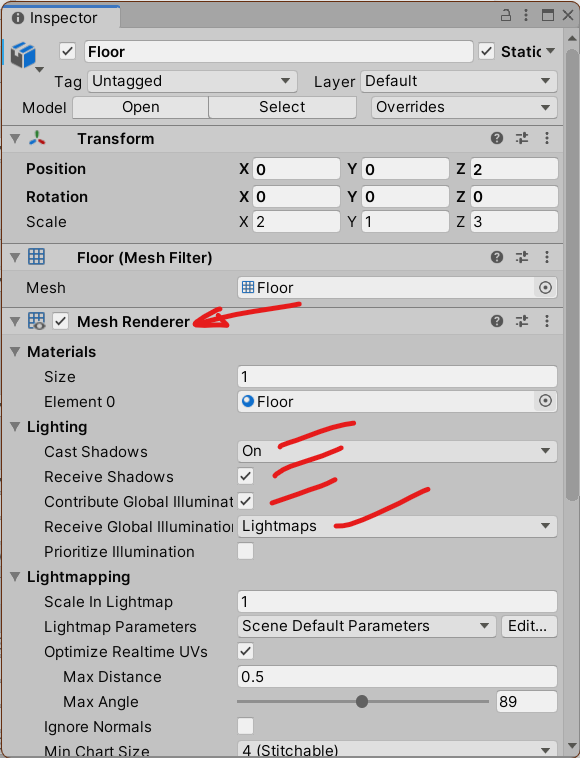
For the GameObjects that cast and receive shadows in the Inspector in the Mesh Render section you must set these options.
- Cast Shadows On
- Receive Shadows Check
- Contribute Global Illumination Check
- Receive Global Illumination Lightmaps
Add UV Coordinates to All Objects
For all the prefabs of objects in your scene to be baked, you must have Lightmap UVs.
To let Unity automatically generate them for you click on each Prefab and in the Inspector under the Model tab, click Generate Lightmap UVs and click Apply. You can click on multiple prefabs to apply this all together.
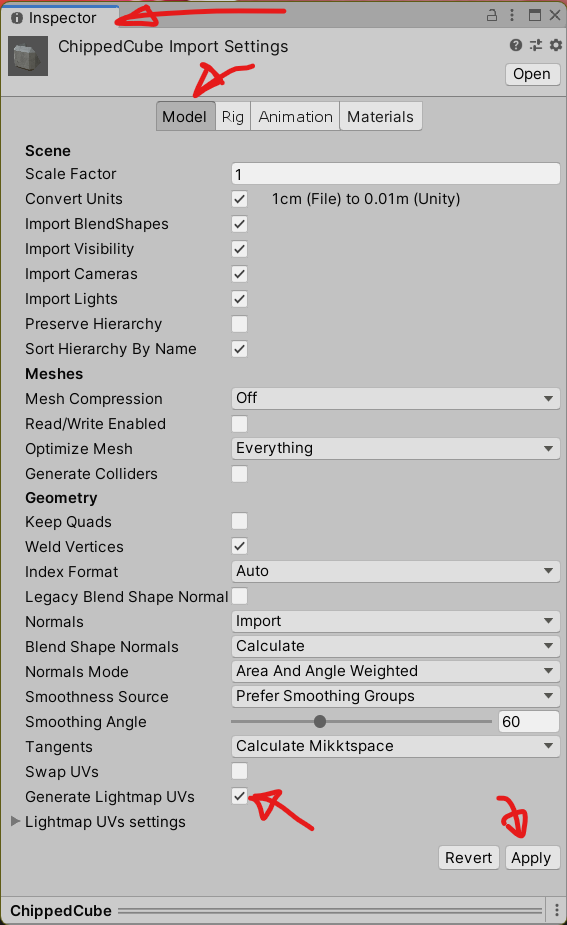
Set All GameObjects and Lights to Static
Only GameObjects and Lights that are set to static will be used for Baked Lighting. Click on the GameObjects in the scene in the Hierarchy list.
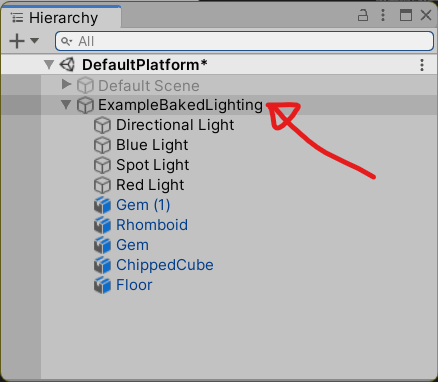
Then go to the Inspector and check Static.
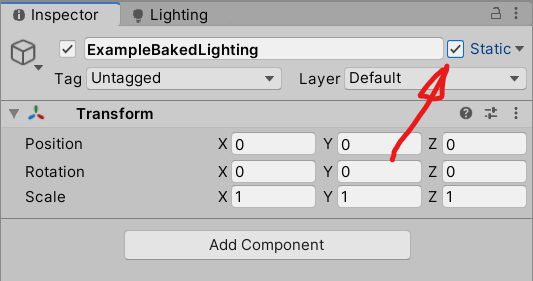
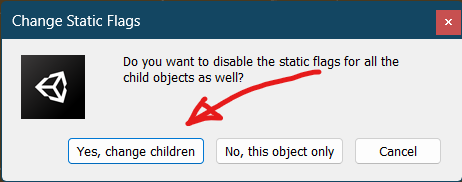
If you change a top level GameObject to static, the Unity Editor will ask if you also want to also set all the children to static, so you can easily change all objects in your scene.
Use a Baked Lighting Compatible BeatSaber Shader
Not all Beat Saber compatible shaders work with Baked Lighting. So far I've found that only the following shaders from BSMG's BS_Shader_Pack (Discord Link) will work:
- Custom.shader
- GlassRefraction.shader
You may be able to find other shaders that work with both Beat Saber's alpha glow problem and Baked Lighting but these two will work for the majority of uses.
Import or Drop the shaders into your Unity Project. Then click on one or all of your materials and choose the Custom or BeatSaber/GlassRefraction shader.
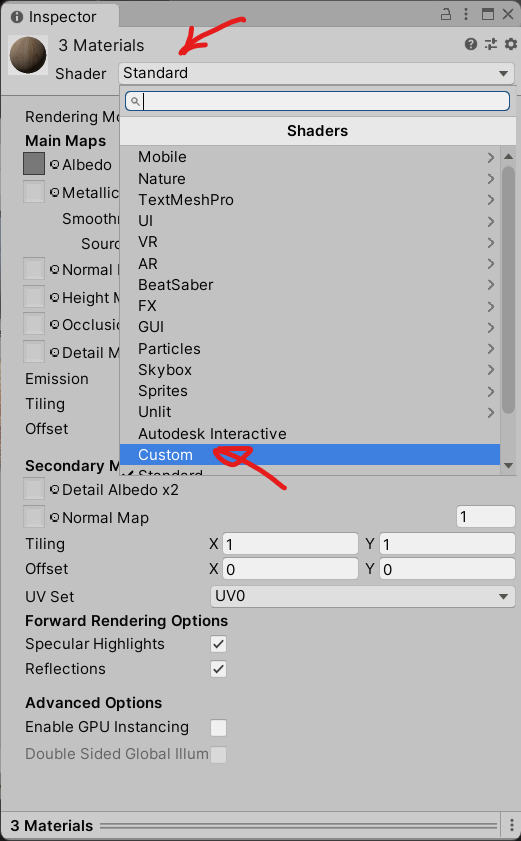
Most details should be copied over but you may have to fix the settings again.
Bake the Lights
Finally when steps 1 to 4 are done, in the menu choose Window -> Rendering -> Lighting Settings to open the Lighting Panel.
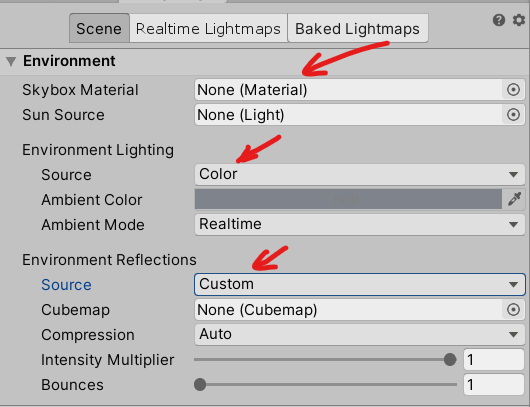
Note that Custom Platforms in Beat Saber cannot export and use the Skybox. However the environment lightings and reflections will influence your baking so set them to the right color or maps.
- Set the Skybox Material to None
- Set Environment Lighting source to color
- Set Environment Reflections to Custom
You can use Progressive GPU (Preview) to do light baking if you have at least one GPU with 4GB VRAM and OpenCL 1.2 support.
You can leave most options as default but I like to increase the Lightmap Size to 2048 and turn off Auto Generate to stop it from constantly baking after every change.
Press Generate Lighting to create the light maps.
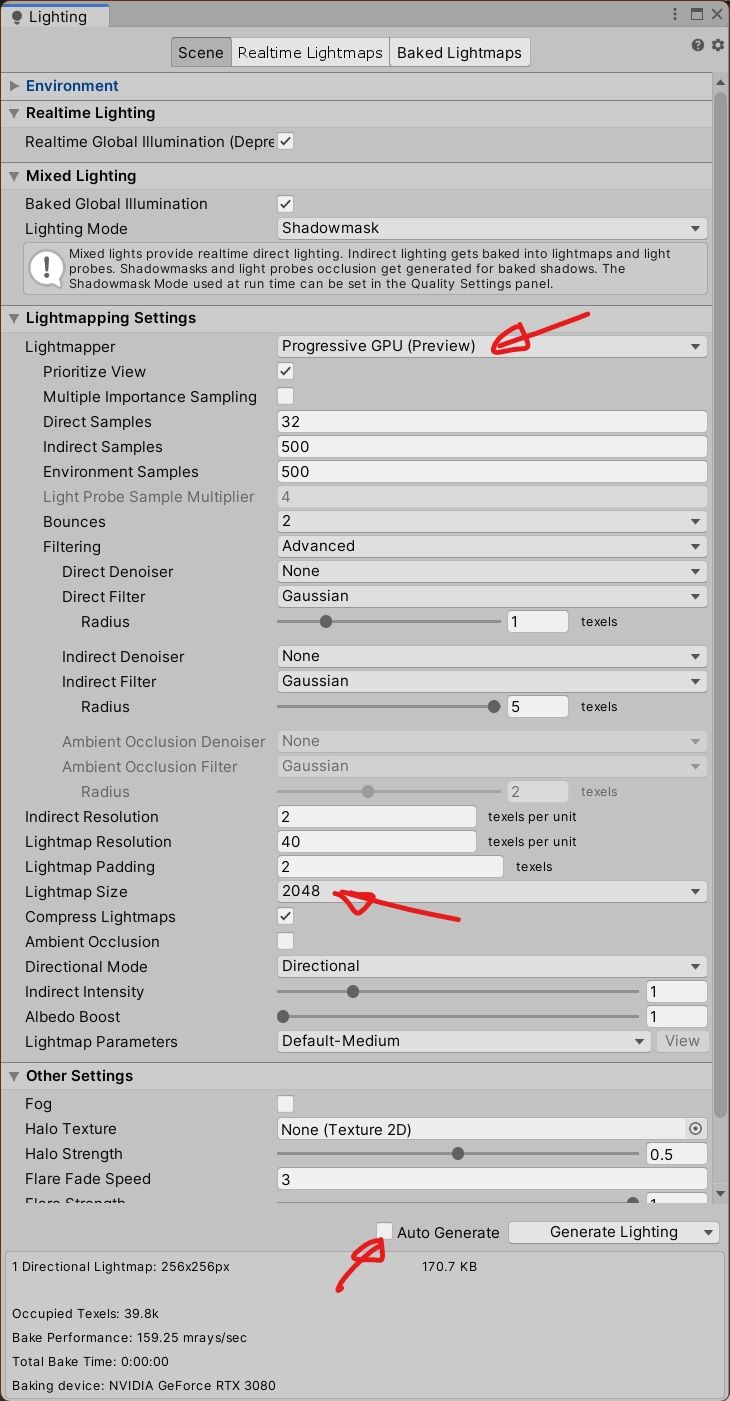
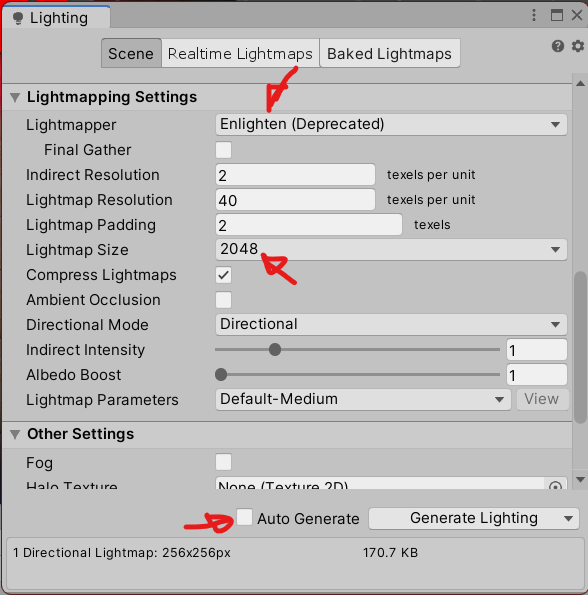
Progressive GPU (Preview) however, sometimes crashes. So you can also Enlighten which uses your CPU but is much slower depending on your scene. Both will make the appropriate light maps.
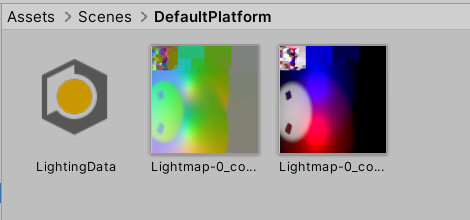
If the bake is successful, in the folder where your scene is there will be a folder of the same name. The lightmap data files will be there.
- LightingData
- Lightmap-0_comp_dir
- Lightmap-0_comp_light
Prefab Lightmapping
These following steps are for saving the baked lighting maps into a Prefab in the Custom Platform to be used inside Beat Saber. Lightmapping data is normally exported per Scene (like in VRChat). But a Custom Platform can only export Assets in an AssetBundle so we have to attach all of the data to a Prefab.
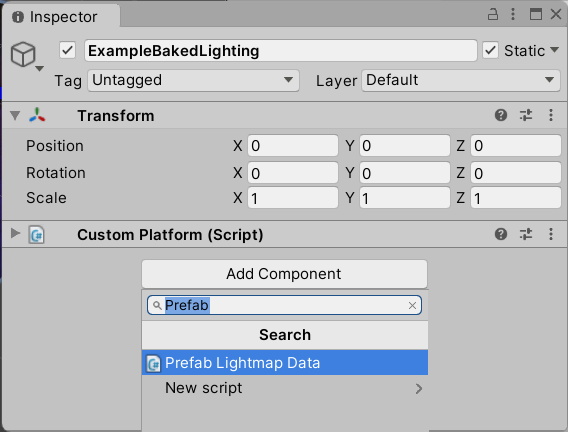
In the GameObject with the Custom Platform script, add a new Prefab Lightmap Data component.
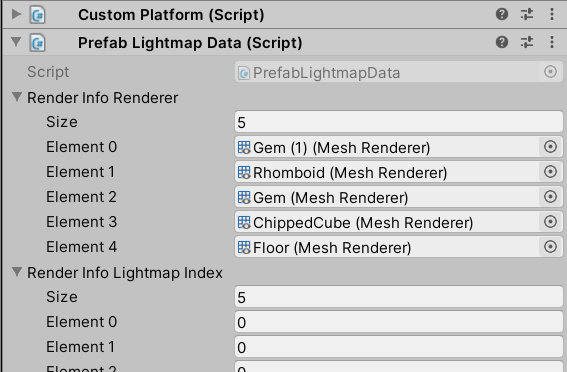
Then go to the menu and choose Assets -> Bake Prefab Lightmaps. Once this is done the entries in the Prefab Lightmap Data component will be filled.
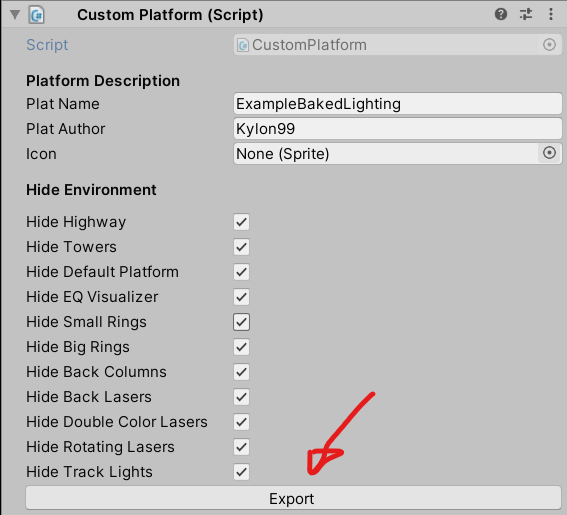
Now you can Export the Custom Platform.
Testing Your Platform in Beat Saber
Baked lighting requires Custom Platforms version 6.1.17 or later.
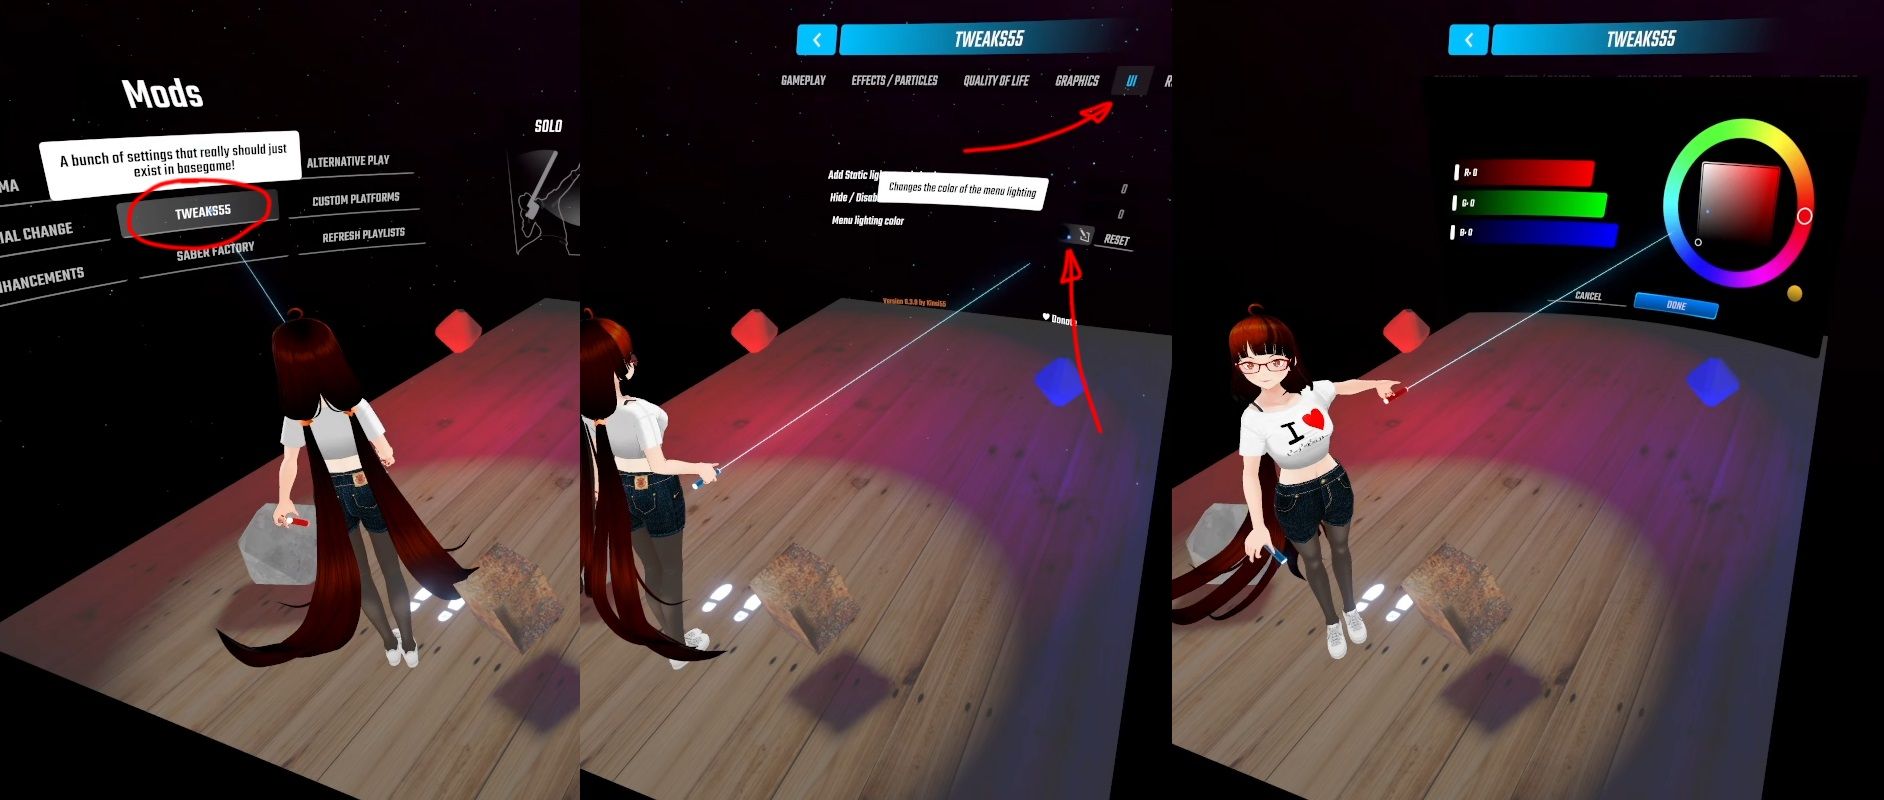
You will also need Tweaks55 to control the Beat Saber menu lights which can interfere with Baked Lighting.
Install these MODs in your Beat Saber/Plugins folder first. You can also install them through ModAssistant.
Copy the exported Custom Platform .plat file to your Beat Saber/CustomPlatforms folder and start Beat Saber.
Use Tweak55 to Change the Menu Light
The Beat Saber menu light will reflect off of baked lighting while in the menu. Go to the Tweak55 MOD, the UI tab and change Menu Light Color. You can set the Beat Saber menu light to black to turn it off or set it to a certain color.
Change the Colored Lights in Game
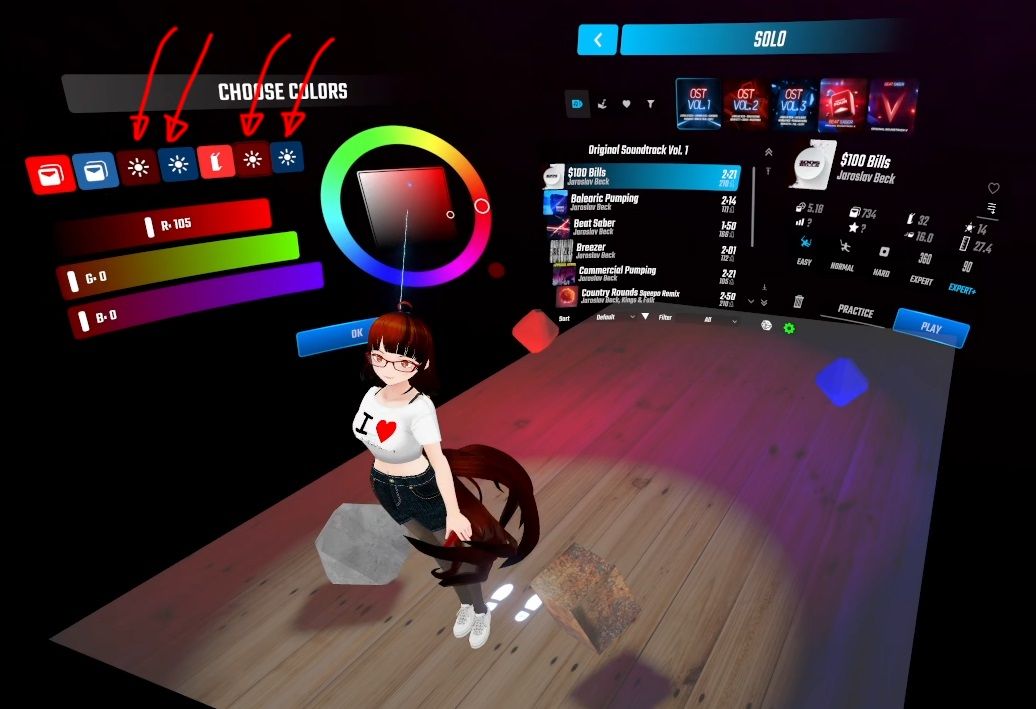
The colored lights during gameplay will also reflect off the baked lighting. During song selection in the Vanilla Tab in the left menu, choose Colors, Override Default Colors and click the Edit Button beside the row of colors. You can set them to black to turn them off or set the colors to enhance the platform lighting.
Other MODs Can Add Lights Which Affect the Platform
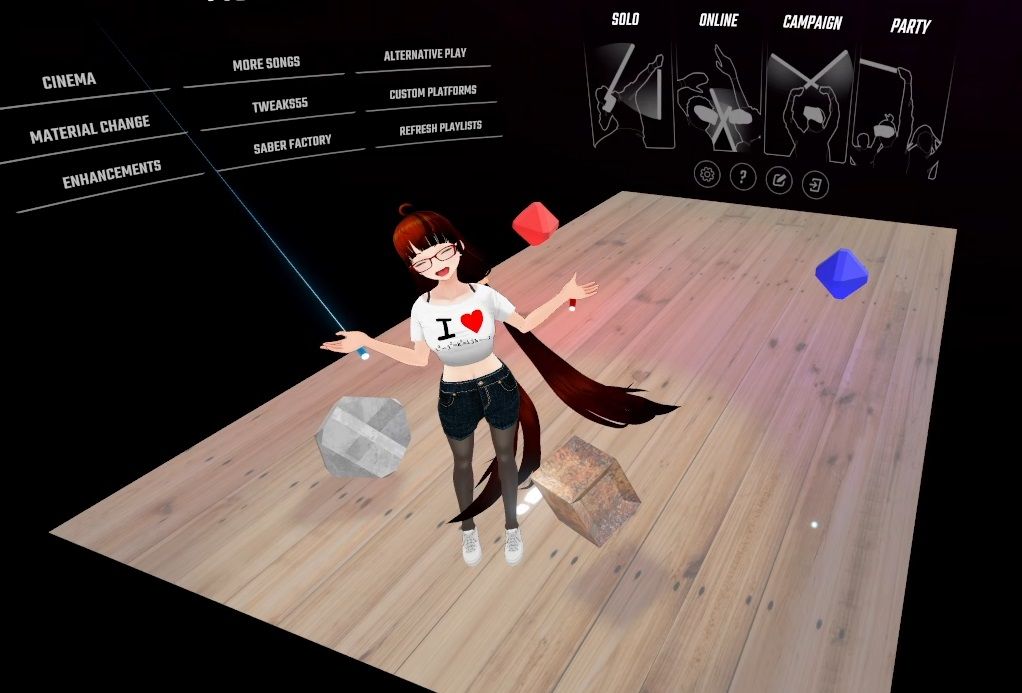
Other MODs can add extra lights into the scene. If they don't have a Culling Mask set to limit Layer 1 they can interfere with baked lighting.
Pictured here is VMCAvatar. If you are using this MOD you can use my VMCLightDisabler to turn off the light whenever the scene changes.
Play Beat Saber
Have fun with your new platform!
